Migrate SBC Routing to the ARM
SBC routing can be migrated to the ARM network. After making sure the SBC is connected to all HTTP ARM services i.e., ARM Topology Server and router/s, you can begin to migrate the routing logic from that configured in the SBC, to the ARM. The screenshots shown here are for illustrative purposes only.
|
●
|
'IP Group' and 'Trunk Group' in the Web are called 'Peer Connection' in the ARM. |
|
➢
|
To migrate routing logic to the ARM: |
|
1.
|
In the Web interface, navigate to the IP Groups page (Setup > Signaling & Media > Core Entities > IP Groups). |
|
2.
|
Locate the IP Group to expose the enterprise network to the ARM environment. Make sure the SIP interface associated with this IP Group is configured as ‘used by routing server'. See Migrate SBC/Gateway/Hybrid Routing to the ARM. |
Web Interface – IP Groups
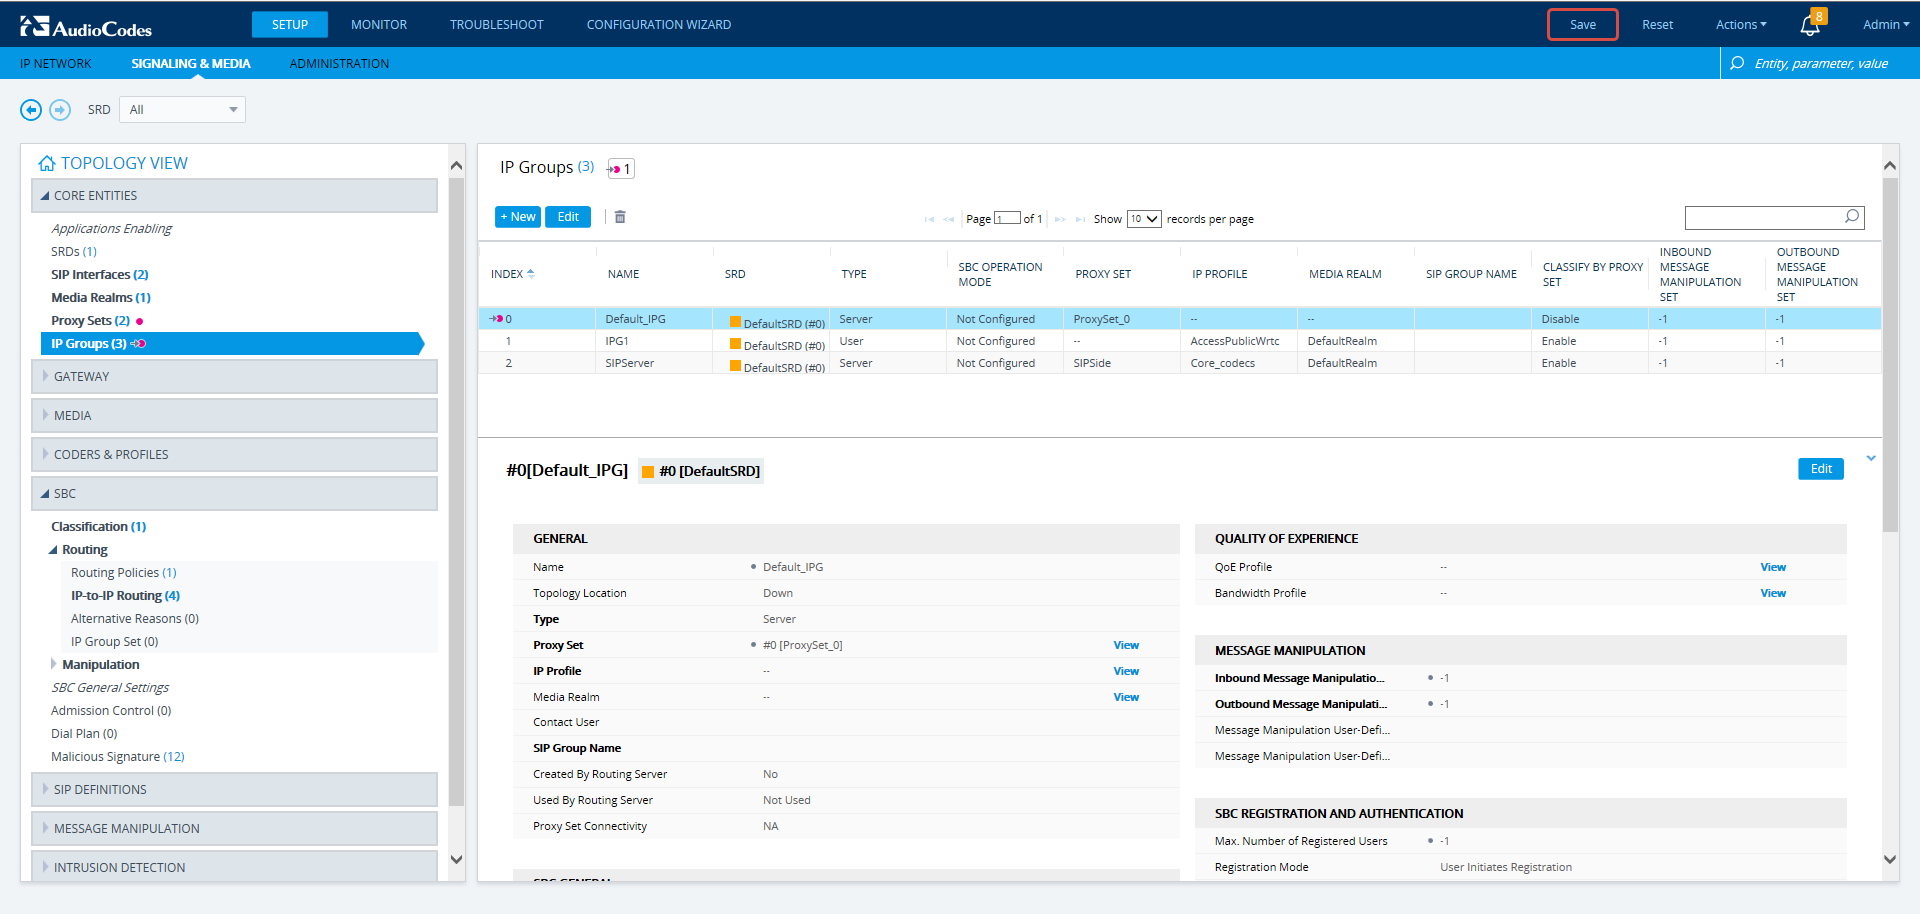
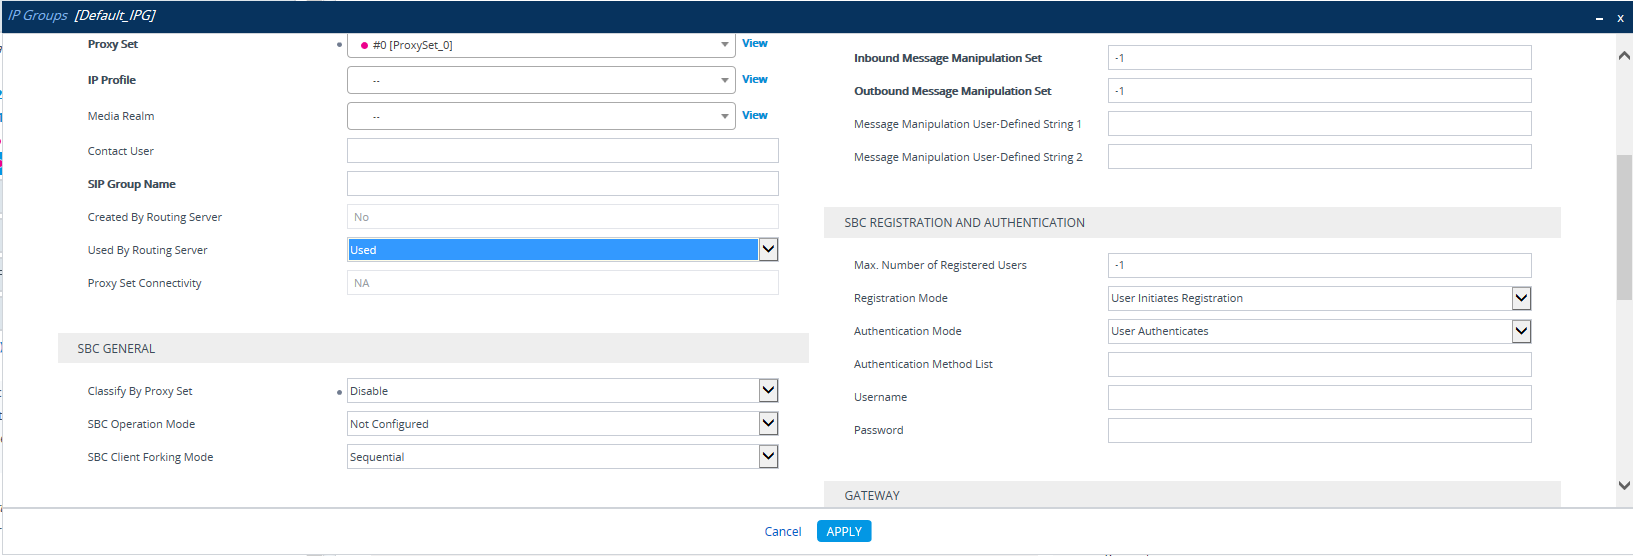
Web Interface – IP Groups - Configuring an IP Group
|
3.
|
[Mandatory] Enter a unique name for the IP Group. |
|
4.
|
[Mandatory] Set the 'Used by Routing Server' parameter to Used. |
|
6.
|
In the ARM GUI, make sure the device is displayed in the Network page, Map view. Verify that the peer connection you configured is displayed. Unlock it and make sure its color is green (see VoIP Peer Information and Actions). |
After configuring an IP group and then viewing it in the ARM, it is strongly recommended not to change its unique name. Changing its unique name will prevent routing by the ARM of calls to this Peer Connection (IP group) and receipt by the ARM of calls from this Peer Connection (IP group).
|
7.
|
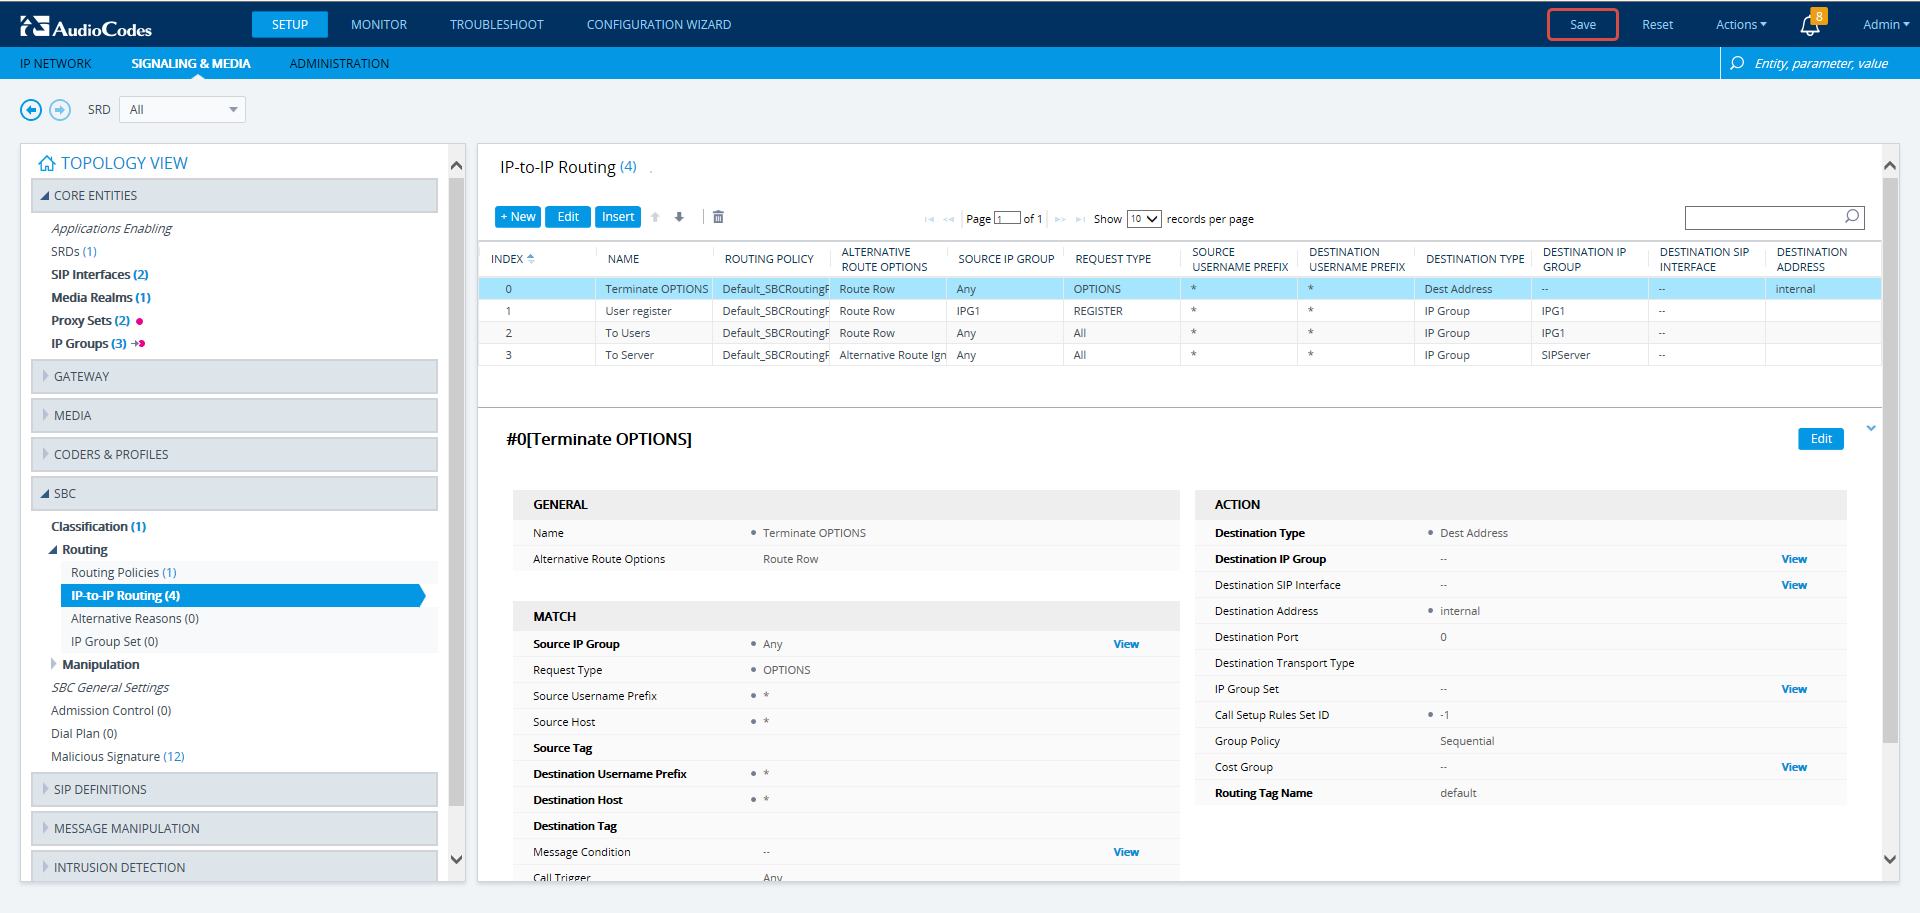
In the Web interface, open the IP-to-IP Routing page (Setup > Signaling & Media > SBC > IP-to-IP Routing). The screen below shows an example of two routing rules. |
Web Interface – IP-to-IP Routing
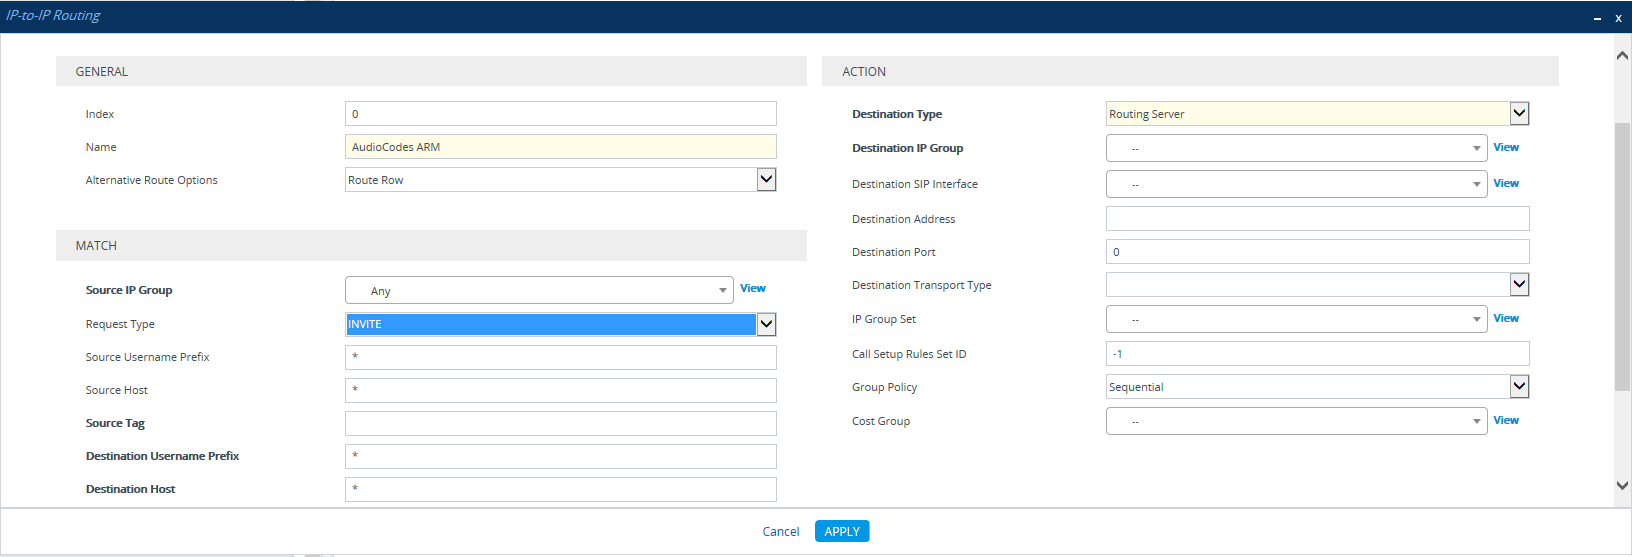
Web Interface – IP-to-IP Routing Table – Add Row – Rule tab
|
9.
|
From the 'Destination Type' drop-down menu, select Routing Server. This rule will serve to perform routing via the ARM. |
|
10.
|
Leave all other fields undefined, and then click Add. |
At this point, your routing service will still be operating according to that defined in the IP-to-IP Routing page in the SBC's Web interface.
|
11.
|
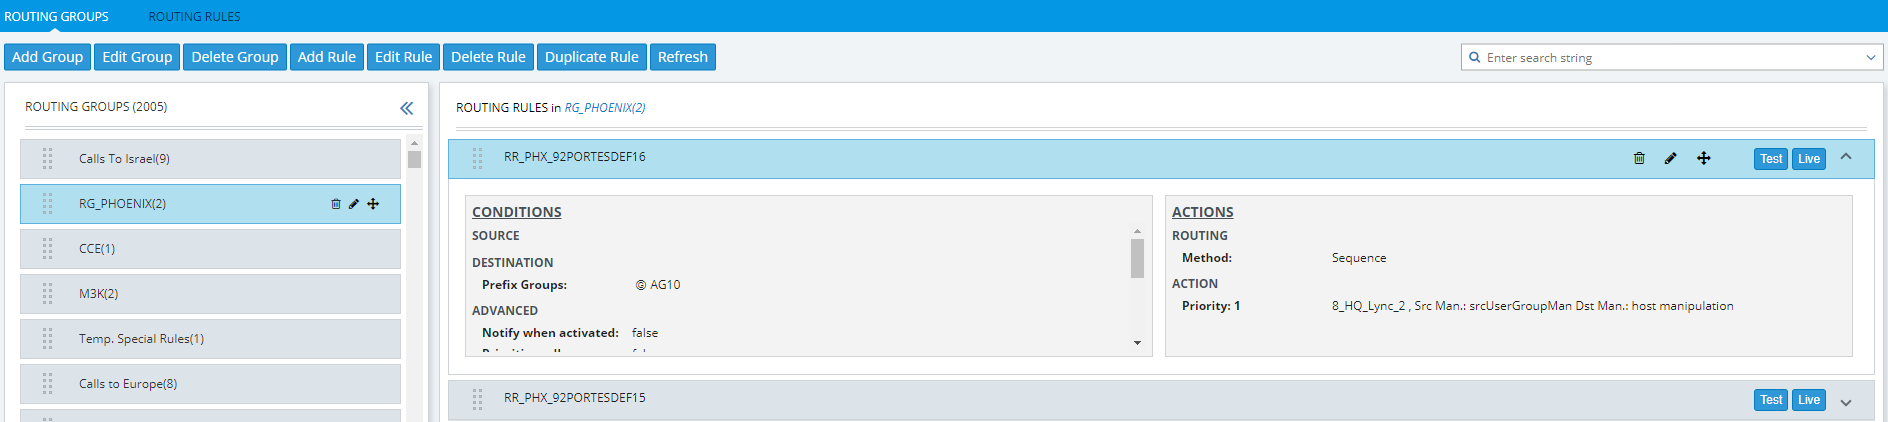
In the ARM GUI's Routing page, configure a rule parallel to one of the rules configured in the Web interface's IP-to-IP Routing page (see Add a Routing Group). |
Configuring a Routing Rule in the ARM
|
12.
|
In the ARM GUI, switch Live the routing rule; rule is now activated in the ARM. |
|
13.
|
In the Web interface, delete the routing rule. The transition is now complete. |
|
14.
|
Perform a Test Route (see Test a Route for detailed information). |
|
15.
|
Make a call and make sure it was established by the ARM. |
Configure manually using the ini file, or in the Web interface's 'Admin' page, configure 'SendAcSessionIDHeader' = 1 for the SBC/Gateway to preserve the Call ID when a call passes through multiple SBCs/Gateways.